Why You’ll Love This Plum Liqueur Recipe
If you’re looking for a delightful homemade treat, you’ll love this plum liqueur recipe. It’s incredibly simple yet yields a rich and flavorful drink that’s perfect for sharing. The sweet, juicy essence of plums infuses beautifully with the gin, creating a vibrant liqueur that’s perfect for sipping or mixing in cocktails. I enjoy making this liqueur during the summer when plums are in season, and it’s a great way to preserve their flavor. Plus, it makes a thoughtful gift for friends and family. Trust me, once you try it, you’ll want to share this recipe with everyone you know!
Ingredients of Plum Liqueur
When it comes to making your own plum liqueur, the ingredients are key to achieving that sweet, rich flavor we all love. You might be surprised at just how simple the list is. With just a few basic ingredients, you’ll be on your way to crafting a delightful homemade treat that will impress your friends and family.
Plus, who doesn’t love a good homemade liqueur? It’s like magic in a bottle, and trust me, once you taste it, you’ll want to whip up a batch every summer.
Here’s what you’ll need for this plum liqueur recipe:
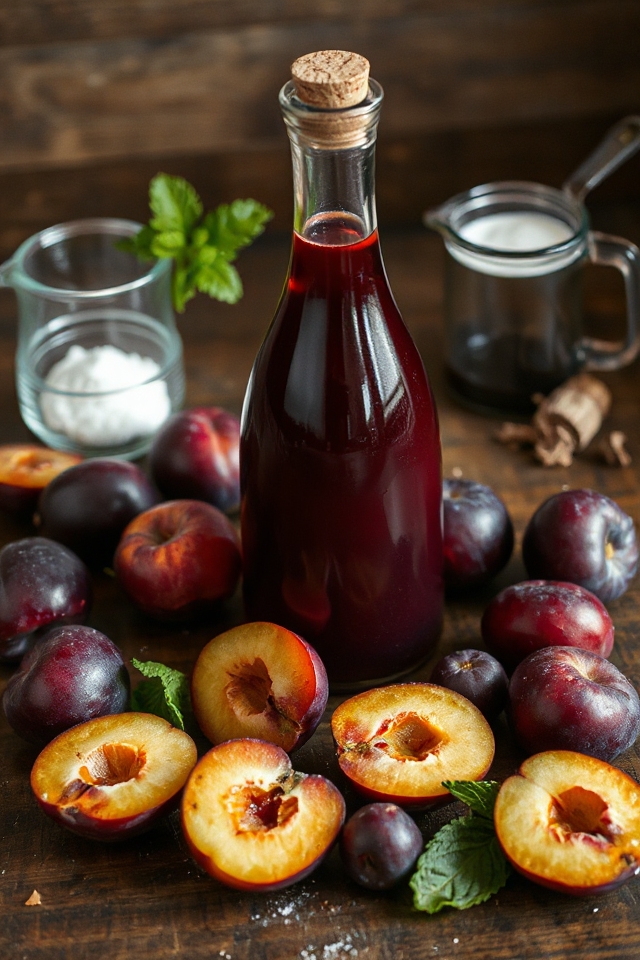
- 500 g plums (that’s about 1 pound)
- 2 cups sugar
- 2 1/2 cups gin
Now, let’s talk about those plums for a moment. It’s best to use ripe, juicy plums, as they pack that sweet flavor we’re after. I mean, who wants a liqueur that tastes like cardboard? Not me!
You can choose any variety you like—some people go for the classic purple plums, while others might opt for yellow or green ones. Just remember, the riper the plums, the better the liqueur.
And if you happen to have a plum tree in your backyard, well, consider yourself the luckiest person in the world. Just be careful not to eat them all before you make the liqueur, okay?
How to Make Plum Liqueur
Alright, let’s plunge into the delightful process of making your very own plum liqueur. It starts with those lovely 500 grams of ripe plums. You’ll want to give each plum a good poke or prick—like a mini acupuncture session, if you will. This helps the sugar get in there and coax out all that juicy goodness.
Once you’ve worked through all your plums, toss them into a jar or a bottle, and sprinkle on 2 cups of sugar. Now, cover it tightly and let it sit for about 2 to 3 days. Just picture the plums soaking up all that sugar like they’re lounging on a beach—it’s a sweet vacation for them, and you’ll be rewarded with the juice running freely.
After your plums have bathed in sugar for a few days, it’s time to introduce 2 1/2 cups of gin to the party. Pour it in, seal that jar up again, and find a warm spot for it to chill out for about two months. Yes, I said two months—this is the part where patience is key.
You’ll want to check on it occasionally, maybe give it a little swirl to mix things up. Think of it as a slow dance, allowing all those flavors to mingle and get to know each other.
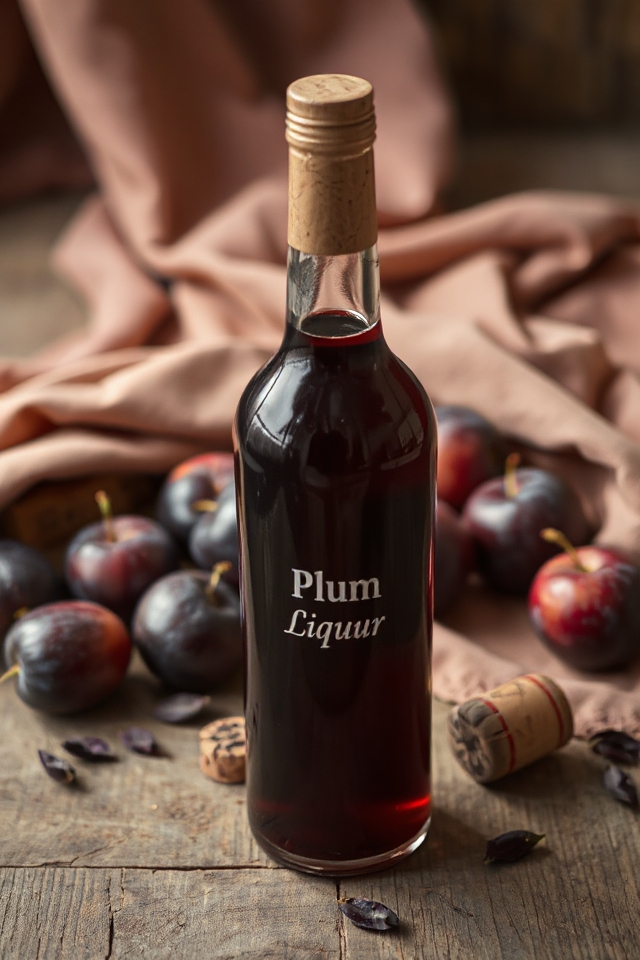
When the time is finally right, strain the mixture using a fine mesh sieve or cheesecloth, making sure to squeeze out every last drop of that luscious juice. The liquid gold that you’re left with can then be poured into sterilized bottles.
Cork them tightly, and voilà! You’ve got your own homemade plum liqueur ready to impress at your next gathering or to sip on during a cozy night in. Just don’t forget to save a little for yourself—you deserve it, right?
Plum Liqueur Substitutions & Variations
While making plum liqueur is a delightful process, you might want to explore some substitutions and variations to suit your taste or what you have on hand.
For instance, if you don’t have plums, try other fruits like peaches or cherries. Instead of gin, vodka or brandy can work beautifully, adding a different flair.
You could also experiment with spices like cinnamon or vanilla to enhance the flavor. If you prefer a less sugary version, reduce the sugar or try honey.
Each tweak offers a unique twist, making your homemade liqueur truly your own creation!
Additional Tips & Notes
For the best results when making plum liqueur, I recommend using ripe, flavorful plums, as their natural sweetness and aroma will enhance your final product.
Make certain to prick the plums thoroughly; this helps release their juices. If you prefer a sweeter liqueur, feel free to adjust the sugar to your taste.
Additionally, storing the jar in a warm, dark place can speed up the infusion process. Don’t rush the straining stage; squeezing out every drop guarantees you capture all the delicious flavors.
Finally, remember to label your bottles with the date to track aging easily. Enjoy your homemade liqueur!